For thousands of years, investment casting has been a successful method for producing near-net shape goods in various forms. While there have been significant advancements and modifications in recent years due to the advent of new materials and manufacturing techniques, the procedures involved in the investment casting process have mainly not altered.
Generally speaking, the eight steps below can be used to summarize investment casting, commonly referred to as lost wax casting.
Master pattern creation
Depending on the needs of the finished product, a sculptor or specialised mold maker will build a master design out of wax, clay, wood, steel, or plastic. These are called “master patterns” because they have two shrinkage allowances—one for wax and the other for casting material shrinkage. A wooden master pattern and its casting are depicted in the Figure below.
These molds are expensive because, depending on the size, shape, and material used, it could require some trial and error to obtain the proper size and form.
Master die / Mould / Mold
A master die, or mold used to manufacture wax patterns, is made to fit the master pattern by casting or machining. Figure shows how advancements in CNC machining technology and tooling have made it feasible to machine a master die from metals such as aluminum and steel without the need for a master pattern.
If the master pattern is made of steel, a metal having a lower melting point than steel can cast the master die directly from the steel master pattern. These days, silicone rubber moulds are also widely utilised since they are easy to use and may be cast straight from a master template. Molds of silicone rubber may tolerate casting temperatures up to 310°C (590°F).
When creating the master pattern and die, shrinkage of the metal cast material, refractory substance, and pattern wax must be taken into account. Adding machining allowances for post-machining on surfaces with tighter tolerances is also a recommended practice. A key element of two-part master dies or molds is the mold alignment locator. To align the two halves and produce exact parts with minimal parting lines or shifts in parting lines, mold locators are necessary.
Pattern
After that, melted wax is injected or poured into the master die, where it is allowed to solidify to produce the designs. On occasion, a coating of wax is applied to the internal cavity walls of the die to produce a hollow pattern. Until the desired pattern thickness is reached, usually about 3 mm (0.12 in), this coating is repeated. The latter should only be used for necessary components. In addition, appropriate polymers and frozen mercury are sometimes used to make designs.
Generally, there are two types of cores: soluble wax and ceramic. Soluble wax cores dissolve from the patterns during pre-processing, whereas ceramic bodies stay in place and are removed once the metal casting has solidified.
A heated metal tool is used in a technique called “chasing” to eliminate flaws like separating lines and flashings. Release chemicals, including silicone sprays, are also used to help remove patterns and prevent pattern damage.
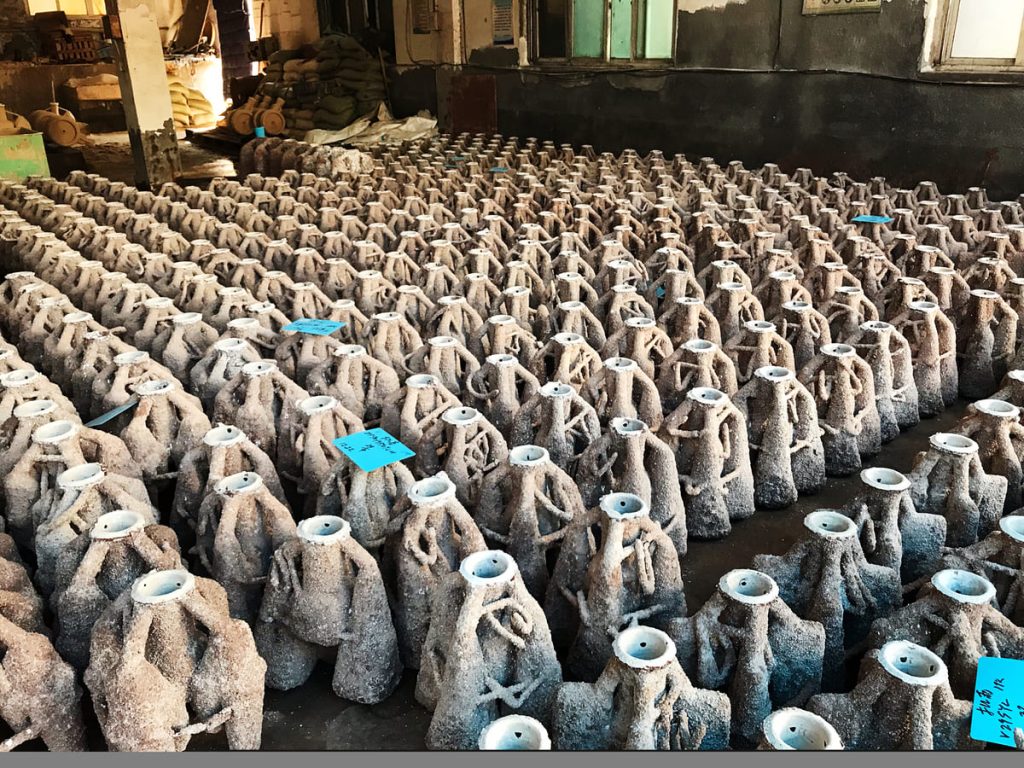
Pattern assembly
Subsequently, the wax patterns are assembled onto one wax sprue. After the wax has been removed, the sprue serves as a channel for the molten alloy to enter the mold in an investing ring.
Sprue holds the wax pattern in place to avoid deformation during the casting process by creating a channel for the molten material to flow into and out of the mold.
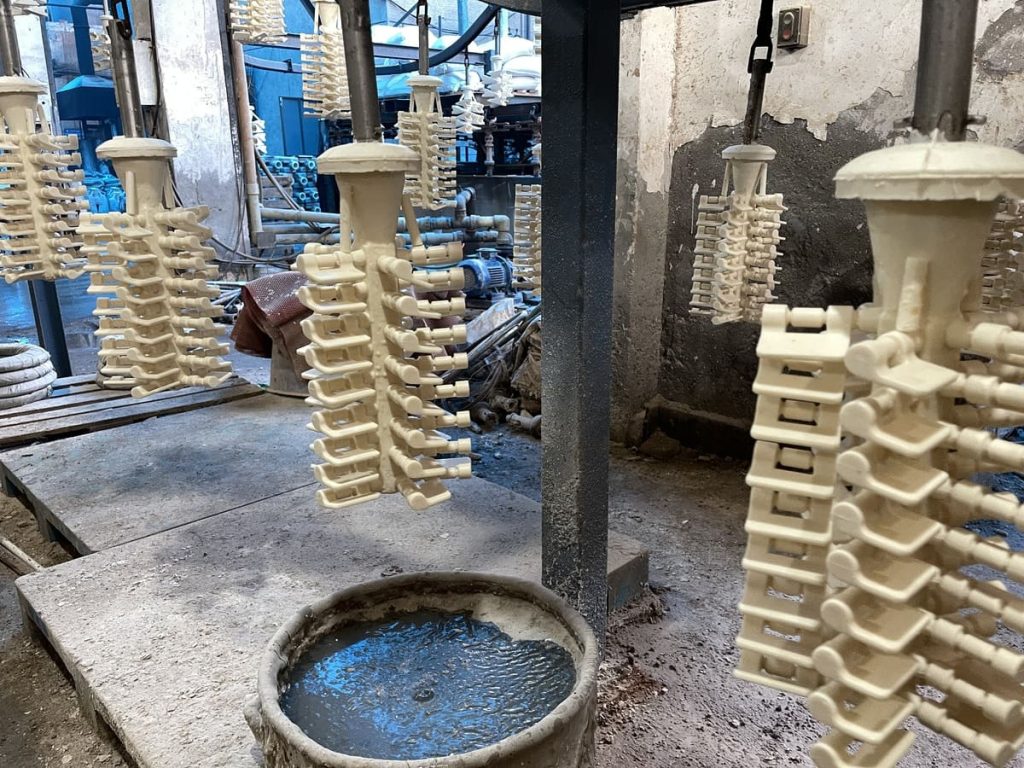
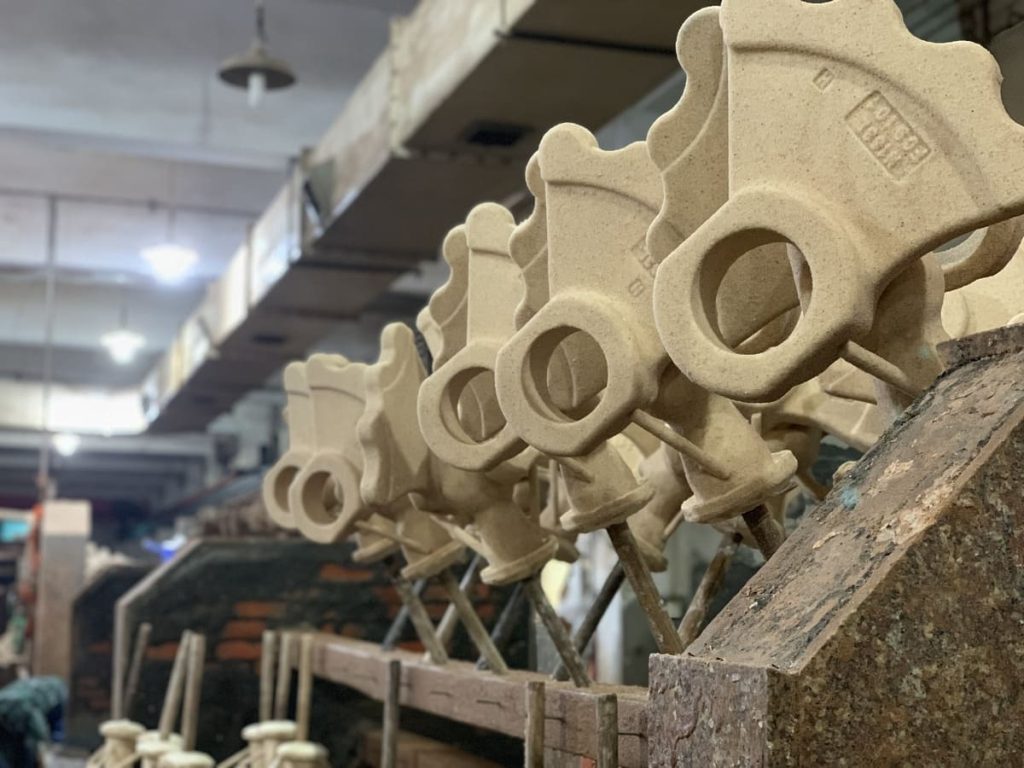
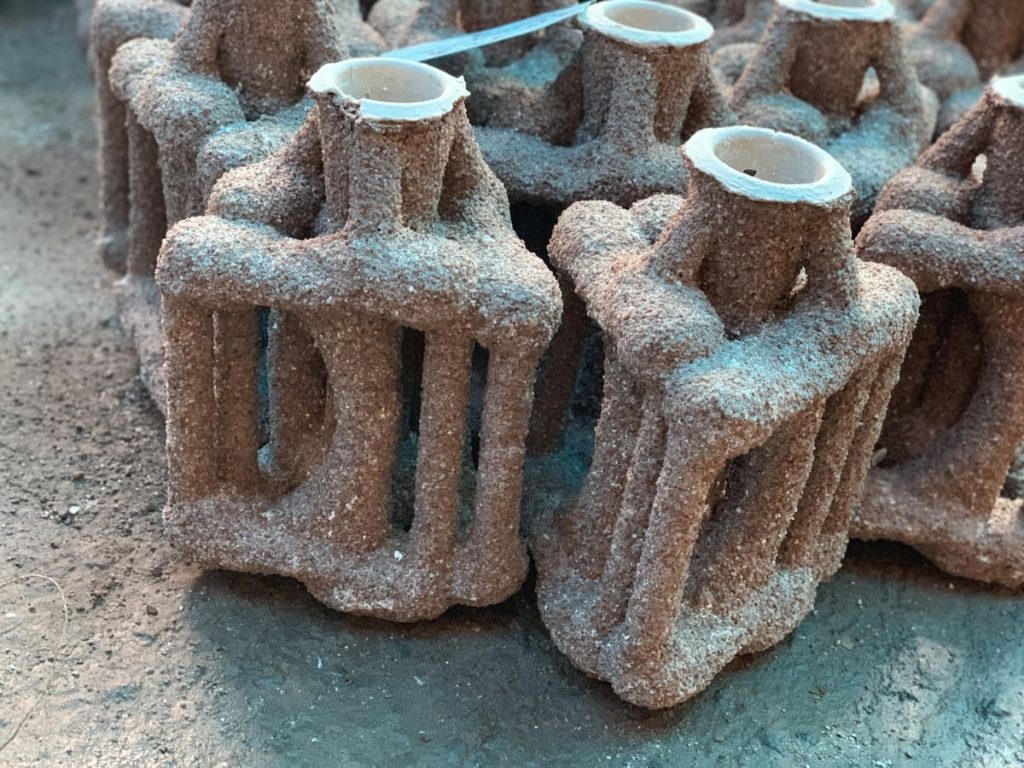
Dipping coating
Next, to create a “prime coat,” or uniform surface coating, the design is dipped into and then emptied out of a slurry of finely crushed refractory material. Very small particle size is deposited during this stage to form a thin but extremely smooth layer of investment material, giving the completed product a smooth surface and intricate details. Very fine silica and other binders, like water, ethyl silicate, and acids, are frequently found in refractory materials.
Following drying the first layer, the design is continuously dipped and coated to strengthen it by increasing its thickness. To increase the thickness and strength of the wet surface, sand or another refractory aggregate is poured over it during the second step of the dipping process, known as “stuccoing.” The thickness ranges from 5 to 15 mm [0.2 to 0.6 in.”].
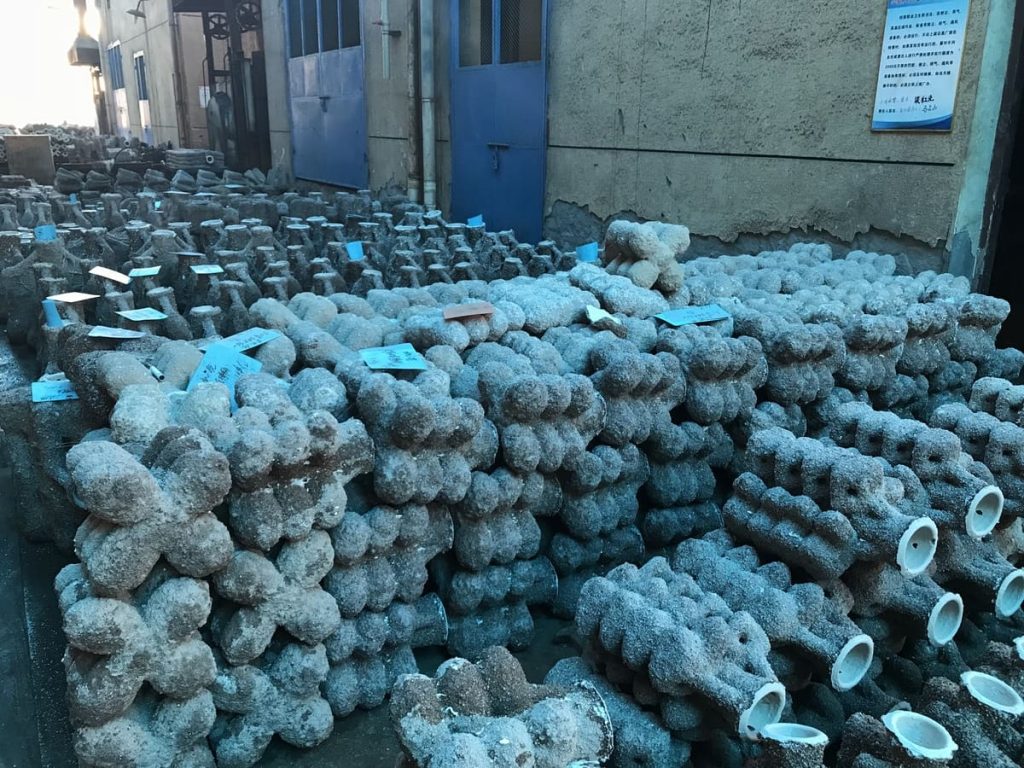
Occasionally, an alternate method involves turning the single-dipped pattern cluster inside out in a permeable flask and surrounding it with liquid investment material. The flask is then shaken to remove any trapped air and make sure the investment material covers the whole surface of the mould tree.
After that, it can dry entirely, which may take 16 to 48 hours. Reducing the humidity in the surrounding air or using a vacuum helps hasten the drying process.
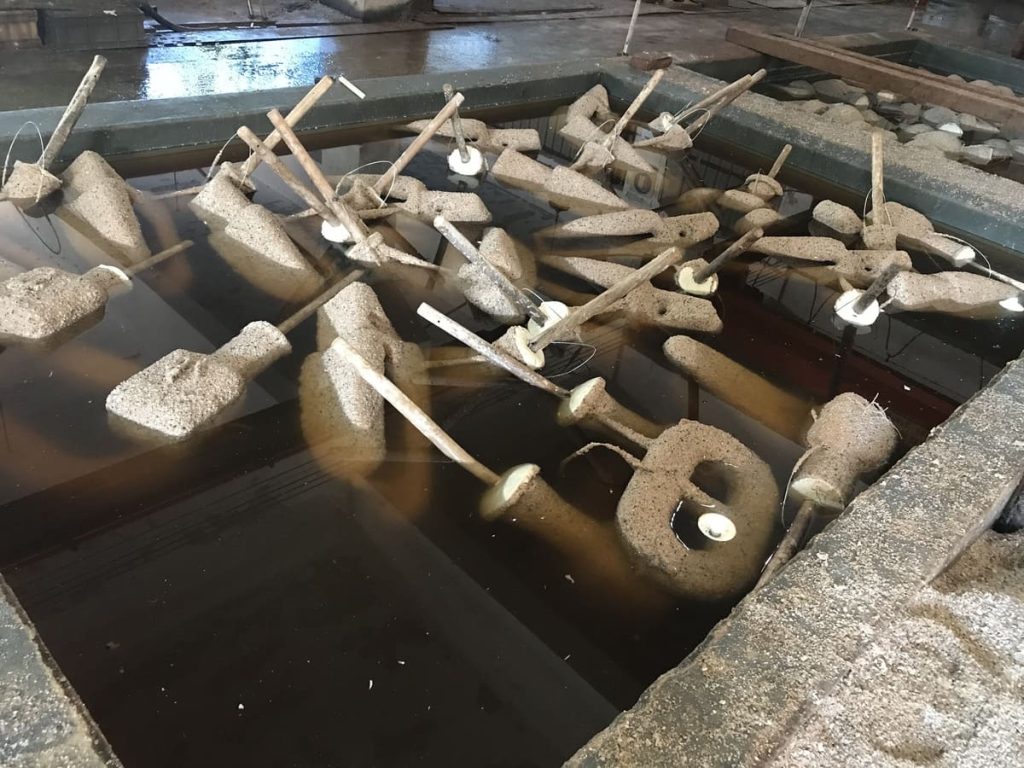
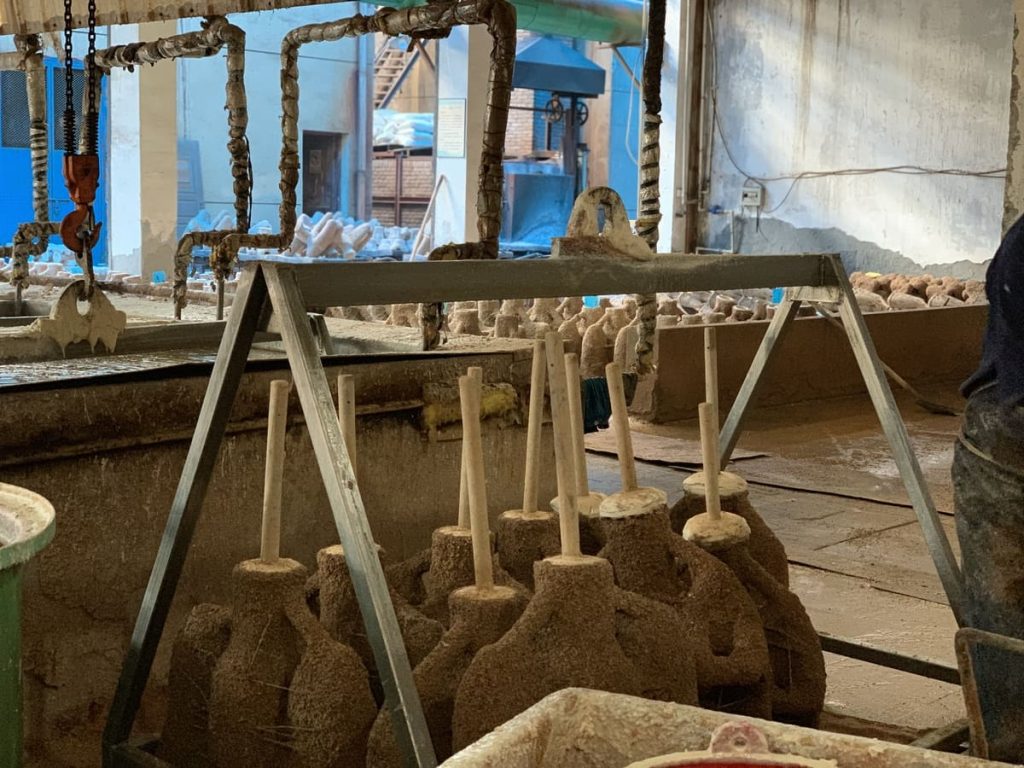
De-waxing and firing
After the refractory material mold has completed drying and curing, it is placed upside-down in an oven or other specific de-waxing autoclave to allow the wax to melt and exhaust itself, vaporizing any remaining material. In the investment casting process, removing the pattern wax from the mold is a crucial step that, if done poorly, will lower batch yield. Another major cause of shell cracking is de-waxing. The most frequent casting flaw in investing is shell cracking.
There are two primary techniques for dewaxing: autoclave (steam) or flash fire. Steam autoclaves are the best option because they heat uniformly and put less strain on the material.
The mold is heated to 90 to 175 degrees Celsius and left upside down for a few hours, perhaps four to twelve hours, to allow the wax to melt and run out. Typically, pattern wax is collected and repurposed. The water of crystallisation is then driven off, and the temperature is kept high (650°C-1095°C) for some time (3-6 hours) to burn any remaining wax. The metal-cast substance determines both the duration and the temperatures.
Most shell failures occur during the dewaxing process because the waxes used have a higher thermal expansion coefficient than the refractory material. Since wax expands more than the investment material, the mold may stress fracture if it is used. To mitigate this effect, rapid heating of the wax will cause the outer layer to melt sooner, allowing the remaining wax to expand without putting excessive strain on the mold. Autoclaves are also utilized to reduce this effect because their heating cycles may be more consistent and precisely regulated.
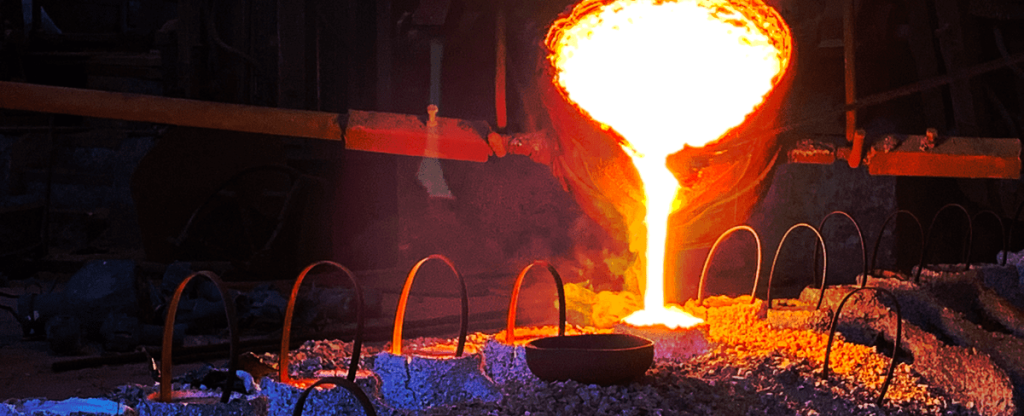
Preheat & Casting
The mold is then heated to prepare it for pouring. Preheating enables the metal to remain molten for a more extended period, improving its ability to fill all mold details and raising dimensional accuracy. After the mold has cooled, any imperfections can be corrected with ceramic slurry or specialty cement. When the mold is heated, the metal and the mold both shrink at the same rate during the cooling process, allowing for more precise dimensional control.
After being poured into the hollow mold, molten metal up to 3000°C is allowed to cool. Although gravity running is the easiest, there are several ways to make sure the mold is filled. Centrifugal casting, tilt casting, vacuum casting, or positive air pressure casting may help mold filling when intricate, thin parts are involved.
Knockout & post-processing
Following the solidification of the metal, the mould is broken, and the metal casting is removed using methods such as high-pressure water jetting, mechanical chipping, vibrating, hammering, and media blasting.
Next, extra metal is removed by cutting away at each casting individually. In most situations, the sprue is removed and reused. After that, the part is post-processed—for example, by post-machining, heat treating, surface treating, painting, or other methods—according to the specifications for the finished product.

 HOME
HOME
 GET A QUOTE
  QUOTE BASKET